 PromotedCountry intro
Xylocopa caerulea, Heesch, Netherlands
Xylocopa caerulea
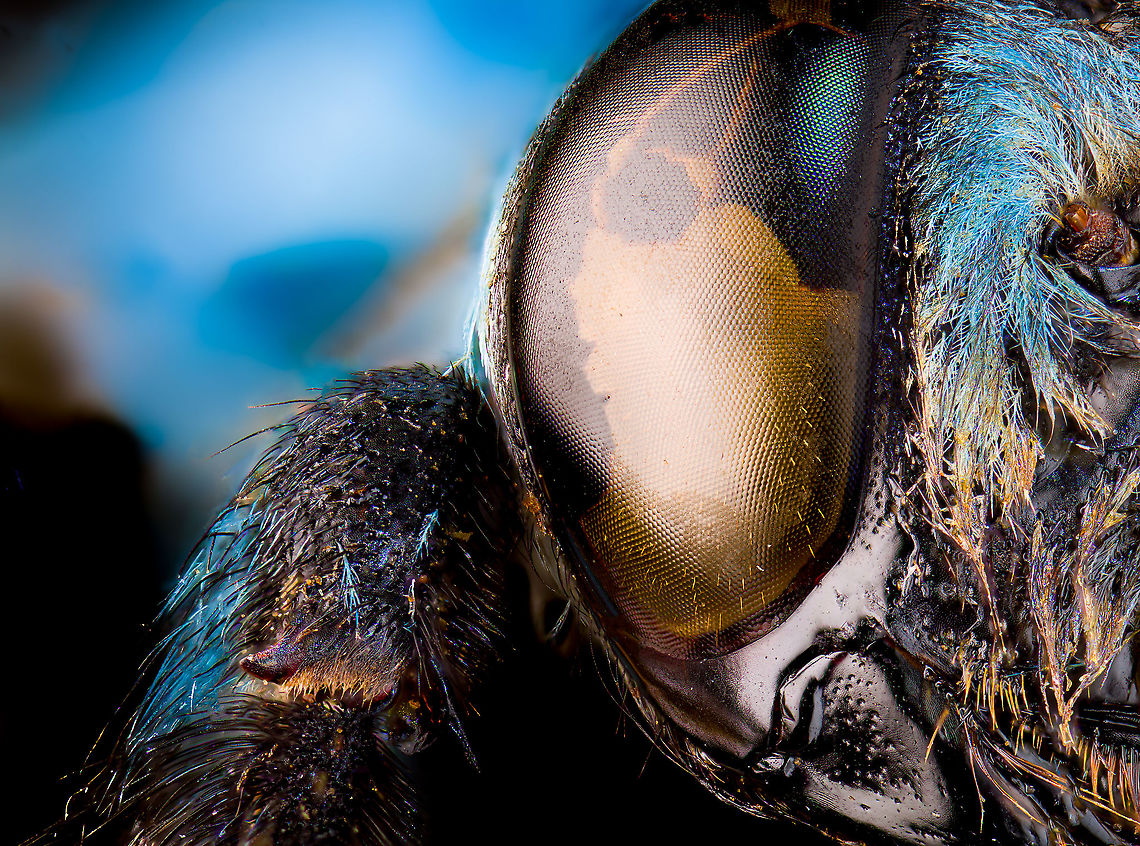
This is a purchased specimen of Xylocopa caerulea. It is quite old, dirty and in a poor state.
Above all this photo serves as a conceptual demonstration or preview of some things I've been working on lately.
The topic is extreme macro lighting. Most people advancing in this hobby ultimately opt for using flash instead of continuous lighting. The advantage of using flash is that it can easily deliver a massive burst of light, which helps in maintaining a shutter speed that eliminates vibration problems that are typical at extreme magnifications.
A very popular flash-based recipe is to use a tunnel diffuser. Basically, the subject is enclosed with a paper cup. Next, you directly flash to the sides of the cup, creating diffuse light all around the subject. This works quite well on a lot of subjects. The subject will be brightly exposed and detail is maximized all around. This approach is reliable, fast and generally succesfull. So it's unsurprising that many use it as their standard light recipe. Some even build permanent structures (boxes) where all they need to do is to insert the subject.
There's also criticism on the approach. In particular on smooth subjects (such as ants and beetles), it can lead to a somewhat clinical, scientific look. In particular, the diffuse light from all directions eliminates most shadows, which is unnatural.
Personally, I favor dramatic lighting, even if it comes at the cost of shadow detail. With that in mind I've been experimenting with a very cool conintuous LED lighting system. To illustrate how it was used in this situation:
- The "key light", a term borrowed from portrait photography, is a LED close to the subject with a huge diffuser attached to it. You can consider this to be the scene's global illumination.
- Another LED unit of lower brightness is used as frontal lighting. It has a so-called honey grid light shaper attached. This creates a narrow beam light. Whereas the key light is soft, the beam light is responsible for the drama and contrasty look.
- Not very well executed in this example but a powerful concept: a backlight hits the subject from the back, creating edge highlights to seperate it from the background. In portrait photography, this would be the model's hair with fine highlights near the edge.
- Also not very well executed but note the spot light near the top of the eye. This is to highlight a tiny part of the subject. This needs further development. In normal flash photography, they use a so-called "snoot" to create a very tiny beam yet in extreme macro you need like a 1mm beam.
- For the first time ever, I'm taking care of the background. This is a magnet-mounted holder where I can insert cards of any color. And not just that, the background itself has its own lighting.
Basically, it's a miniature photo studio with full control of light. It's tons of fun the play with it, but also surpremely difficult and time consuming to realize what I want, as basically I have no idea what I'm doing. So do keep expectations low for now, the learning curve is steep.
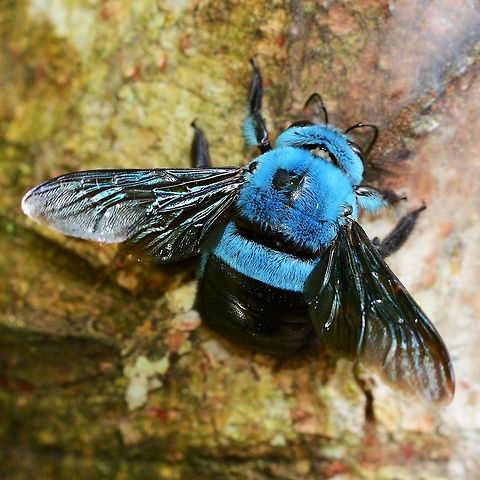
''Xylocopa caerulea'', the Blue Carpenter Bee, is a species of carpenter bee.

comments (7)
I will soon document my entire setup, which has had lots of upgrades. Will take me a few weeks, want to make it another article. The background is quite simple, it's just a color card behind the subject, with a magnet holding it in place. Posted 4 years ago
Posted 4 years ago
Not as easy as it sounds though, because it's a weak light that needs to sync with stronger lights. Posted 4 years ago